If you are considering a metal roof, you are probably looking for something that feels like a long-term upgrade, not a quick patch. Metal roofing can deliver serious durability, modern curb appeal, and smart energy performance when it is chosen and installed correctly.
It is also less forgiving than many homeowners expect, especially around flashing details and fastener placement, which is why planning matters as much as the panels themselves.
In this guide, I will walk you through the big decisions, essential tools, installation sequence, and safety steps that keep projects on track.
If you want a deeper look at how rooflines and exterior design choices can complement an addition or ADU, you may also like this resource on popular ADU designs for San Jose urban homes. For background on how reflective roofing can reduce heat gain, this U.S. Department of Energy overview on cool roofs is a helpful starting point.
Understanding Metal Roofing: Types, Benefits, and Suitability
Metal roofing is not one product. It is a category, and the “right” option depends on your roof slope, your climate, and how much maintenance you want to deal with.
Common metal roofing types (and what they mean for your install)
- Standing seam panels (concealed fasteners)
Clean lines, fewer exposed penetrations, and typically a higher price point. Standing seam systems often use clips or concealed attachment methods designed to allow controlled movement as the metal expands and contracts. - Corrugated or ribbed panels (exposed fasteners)
A popular residential metal roofing option for sheds, additions, and some homes. These systems rely on correctly installed screws with washers and require careful attention to fastener spacing and straight panel layout. - Metal shingles or metal tiles
Designed to mimic traditional materials while offering metal performance. Installation is more like shingle roofing, but still requires metal-specific flashing and detailing.
Advantages of metal roofs
If you are weighing the advantages of metal roofs against asphalt, here are the benefits homeowners usually feel most:
- Longevity and durability when the system is installed to manufacturer’s specs.
- Lower maintenance than many traditional roofs, especially when flashing and sealant details are done right the first time.
- Energy efficiency potential is achieved when you select reflective finishes and a ventilation strategy that fits your attic or roof assembly.
- Fire and weather performance in many rated assemblies, depending on the product and how the full system is built.
Standing seam vs corrugated: how to choose
A simple decision filter:
- Choose standing seam if you want a premium finish, fewer exposed fasteners, and a system engineered for long-term movement and weather resistance.
- Choose corrugated/ribbed panels if you want a cost-conscious solution and you are confident you can execute straight runs, correct overlaps, and consistent fastener placement.
Is metal right for your specific home?
Before you buy anything, confirm these “fit” factors:
- Roof slope: Some metal roof systems require minimum slopes, and low-slope roofs are a different conversation entirely.
- Coastal or high-moisture exposure: Material selection and coatings matter.
- Wildfire or high-wind zones: Look for tested assemblies and documentation, not just marketing language.
- Your project scope: A full replacement, a re-roof over existing materials, or a new build will change your prep work.
If you are already thinking about future space planning, roof style, and pitch choices can also affect ADU massing and exterior design.
This is where browsing popular ADU designs for San Jose urban homes can be surprisingly useful, even if your project is “just roofing.”
Essential Tools and Materials You’ll Need for a Successful Installation
A solid metal roofing tools list can prevent 80 percent of the common mistakes that lead to leaks, waviness, or premature corrosion. Here is what you will typically need.
Installation materials and components
- Metal panels (standing seam or corrugated) plus matching trim:
- eave/drip edge trim
- gable/rake trim
- valley metal (if applicable)
- ridge cap and closures
- sidewall and headwall flashing (for roof-to-wall transitions)
- Underlayment installation for metal roofs
- synthetic underlayment (commonly used)
- self-adhered membrane at eaves/valleys in many climates
- Fasteners and screws for metal roofs
- manufacturer-approved screws (often with washers for exposed-fastener systems)
- clips and specialty fasteners for standing seam systems
- Sealants and tapes
- Butyl tape for laps and trims where specified
- high-quality sealant approved for roofing and exterior exposure
- Ventilation components (if you are updating intake/exhaust at the same time)
- Replacement decking (plywood/OSB) for any damaged areas you discover
Tools you will actually use (not just buy)
- Tape measure, framing square, chalk line, string line
- Circular saw with metal-cutting blade, electric shears, or a nibbler (tool choice depends on panel type)
- Cordless impact driver with clutch control
- Hand seamer (useful for certain trims and details)
- Rivet gun (for some trim assemblies)
- Caulk gun for sealant
- Magnetic sweeper and shop vac (metal shavings matter)
Safety gear for roof installation
- Fall protection suited to your roof height and slope
- Ladder stabilizer and ladder levelers
- Cut-resistant gloves, safety glasses, and hearing protection
- Non-slip footwear designed for roof traction
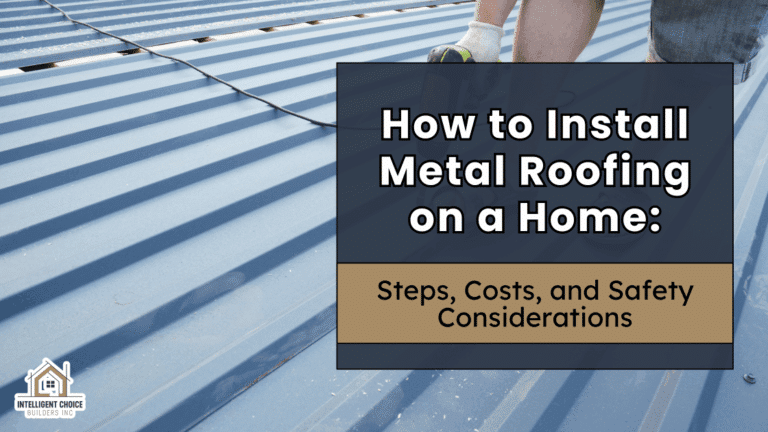
Step-by-Step Guide: How to Install Metal Roofing on a Home
DIY metal roof installation steps vary by product, but the overall sequence stays consistent. If you take one thing from this section, let it be this: most roof failures happen at edges, penetrations, and transitions, not in the middle of a panel.
1) Confirm codes, slope, and manufacturer requirements
Before demo day, verify:
- permit requirements in your area
- minimum slope for your chosen system
- approved underlayment and fastening schedule for wind exposure
- ventilation requirements for your roof assembly
2) Measure, order, and plan your layout
Accurate measuring and cutting panels starts with a layout plan:
- Measure roof planes and confirm the square by checking diagonals.
- Plan panel direction so laps and seams shed water correctly.
- Order extra material for waste, cuts, and the learning curve (especially if this is your first metal roof).
Pro layout tip: Snap chalk lines for your starter edge and reference lines up the roof plane. Straight panels are not optional. One bad starter row can ripple errors all the way to the ridge.
3) Tear off and inspect the roof deck
If you are replacing an existing roof:
- Remove old roofing material as required.
- Inspect sheathing for rot, delamination, and fastener pull-through.
- Replace compromised decking and re-nail as needed.
If you are installing over an existing roof (where allowed), be extra cautious: trapped moisture, uneven surfaces, and hidden damage can shorten roof life.
4) Install underlayment and edge protection
Underlayment installation for metal roofs is where a watertight system begins:
- Install underlayment per manufacturer instructions, maintaining overlaps and sealing penetrations.
- Use self-adhered membrane at eaves, valleys, and around penetrations where appropriate for your climate.
- Install drip edge/eave trim and any starter trims as specified.
5) Flashing first: valleys, walls, and penetrations
This step is where many DIY installs go sideways. Take it slow.
- Install valley metal before field panels if your roof has valleys.
- Install step flashing or continuous flashing at roof-to-wall transitions (depending on design and code).
- Use appropriate boots and flashing details around pipes, vents, skylights, and chimneys.
Rule of thumb: If water can reach it, you need a flashing detail that anticipates wind-driven rain, not just “normal” rainfall.
6) Install panels: start square and stay consistent
Securing panels properly depends on your system:
For exposed-fastener panels (corrugated/ribbed):
- Start at the eave, align the first panel perfectly square, and fasten according to the manufacturer’s pattern.
- Use the correct screw type and washered fasteners where specified.
- Avoid overdriving screws (this can deform washers and cause leaks).
- Use the correct overlap direction and sealant/butyl tape where required.
For standing seam panels:
- Install clips or attachment systems precisely to the layout lines.
- Confirm clip spacing for your wind zone and roof zones (edges and corners often require tighter spacing).
- Engage seams per system design (snap-lock, mechanical lock, etc.).
- Allow for thermal movement as intended by the manufacturer.
7) Install closures, ridge cap, and finish trims
Most leak callbacks happen at terminations. Be meticulous here:
- Install foam closures or vented closures as specified.
- Install the ridge cap with correct overlaps and fastener spacing.
- Install gable/rake trim and seal where required.
- Clean the roof surface to remove metal shavings and debris.
8) Final walkthrough and water test strategy
Instead of blasting a hose everywhere, use a controlled check:
- Visually inspect fastener lines and washers.
- Confirm every penetration has a complete flashing detail.
- Check transitions, ridges, and valleys first.
Estimating the Costs: Budgeting for Materials and Labor
The cost of installing metal roofing per square foot swings widely based on panel type, tear-off needs, roof complexity, and local labor rates. Standing seam generally costs more than corrugated panels due to materials, trim complexity, and labor intensity.
What your budget should account for
Materials
- panels, trim, ridge cap, valley metal
- underlayment and membranes
- fasteners, clips, sealants, closures
- replacement decking (if needed)
- ventilation upgrades (often overlooked)
Labor costs for roofing installation
- tear-off and disposal (if replacing)
- deck repairs
- underlayment and flashing work
- panel installation and trim finishing
Hidden expenses in roof replacement
- permits and inspections
- dump fees and disposal
- fascia repairs discovered during the tear-off
- skylight replacement or re-flashing
- gutter upgrades
- specialty accessories (snow guards, walk pads, chimney cricket repairs)
DIY vs professional costs comparison
DIY can reduce labor costs, but it increases your risk exposure:
- Metal roofing is less forgiving than many DIY projects because small errors compound.
- A professional crew typically brings product-specific tools, installation speed, and detail experience that directly impacts leak risk.
- Many manufacturers’ warranties require documented installation standards.
If your roof has multiple penetrations, complex valleys, dormers, or steep slopes, hiring a professional is often the most cost-effective decision over the life of the roof.
Safety Considerations Before and During Metal Roof Installation
This is the section you should not skim. Roofing is one of the highest-risk home improvement categories, and metal can be especially slick.
Safety tips for working on roofs
- Never work alone. Have a spotter and a plan.
- Keep your roof surface clean. Loose scraps, packaging, and metal offcuts are trip hazards.
- Wear cut-resistant gloves. Panel edges and trims can be razor-sharp.
- Treat every step like the roof is slippery, because it often is.
For a practical overview of fall protection fundamentals, review OSHA’s guidance on fall protection in residential construction.
Fall protection equipment for DIY installers
At minimum, plan for:
- properly rated harness and lanyard system
- roof anchor that matches your roof structure
- lifeline or rope grab setup
- stable ladder setup with correct angle and secure tie-off
If you do not have a confident fall protection plan, this is a strong sign to hire a professional.
Weather considerations when installing metal roofs
- Avoid wet conditions, morning dew, frost, and high wind.
- Avoid extreme heat if panels are in direct sun. Hot metal can burn skin and soften some sealants.
- Do not install when rain is possible unless you can fully dry-in the roof the same day.
Troubleshooting Common Issues During Installation
Even careful installs run into snags. Here are the most common mistakes in metal roof installation and what to do when you spot them early.
How to avoid leaks in metal roofing systems
Most leak sources fall into four buckets:
- Overdriven or underdriven fasteners (exposed-fastener systems)
- Missing or incorrect closures at ridges and eaves
- Poor flashing integration at walls, valleys, and penetrations
- Improper overlaps with missing sealant or tape where required
Quick checks you can do:
- Look for washers that are crushed flat or visibly gapped.
- Confirm sealant is continuous where specified, not spot-applied.
- Confirm panel laps shed water and are not installed “against” the drainage direction.
Fixing misaligned panels or fasteners
If you are only a few panels in and notice drift:
- Stop and correct it immediately.
- Remove and reinstall panels rather than forcing trims to “hide” misalignment.
- Re-check your reference lines and starter edge.
Oil canning and waviness
Oil canning is often aesthetic, but it can be a symptom of installation stress:
- Confirm panels are not being forced into place.
- Confirm clip spacing and attachment method match the system design.
- Consider a thicker gauge or a profile designed to minimize waviness if aesthetics are critical.
Scratches, metal shavings, and corrosion risk
- Remove metal shavings immediately. They can rust and stain panels.
- Touch up minor scratches with manufacturer-approved methods.
- Avoid mixing dissimilar metals in a way that can accelerate corrosion (ask your supplier if you are unsure).
Why Installing Metal Roofing Can Be a Smart Investment and Your Next Steps Forward
A metal roof can be a smart investment because it pairs long-term performance with strong curb appeal and can support energy-efficiency goals when you choose the right finish and ventilation strategy. The key is matching the product to your roof slope and climate, then executing the details, especially underlayment, flashing, and terminations, with zero shortcuts. If you want to align roofing decisions with broader exterior planning, browse popular ADU designs for San Jose urban homes and think about how roof pitch, overhangs, and material choices fit the look you want.
Short takeaway: If you want a metal roof that performs for decades, spend your effort on planning, dry-in details, and safety. When the roof is complex or steep, hiring a qualified installer is often the most cost-effective way to protect your home and your investment.